Mouthwatering Chicken (and Magic Garlic Gravy!)

DSC_0123

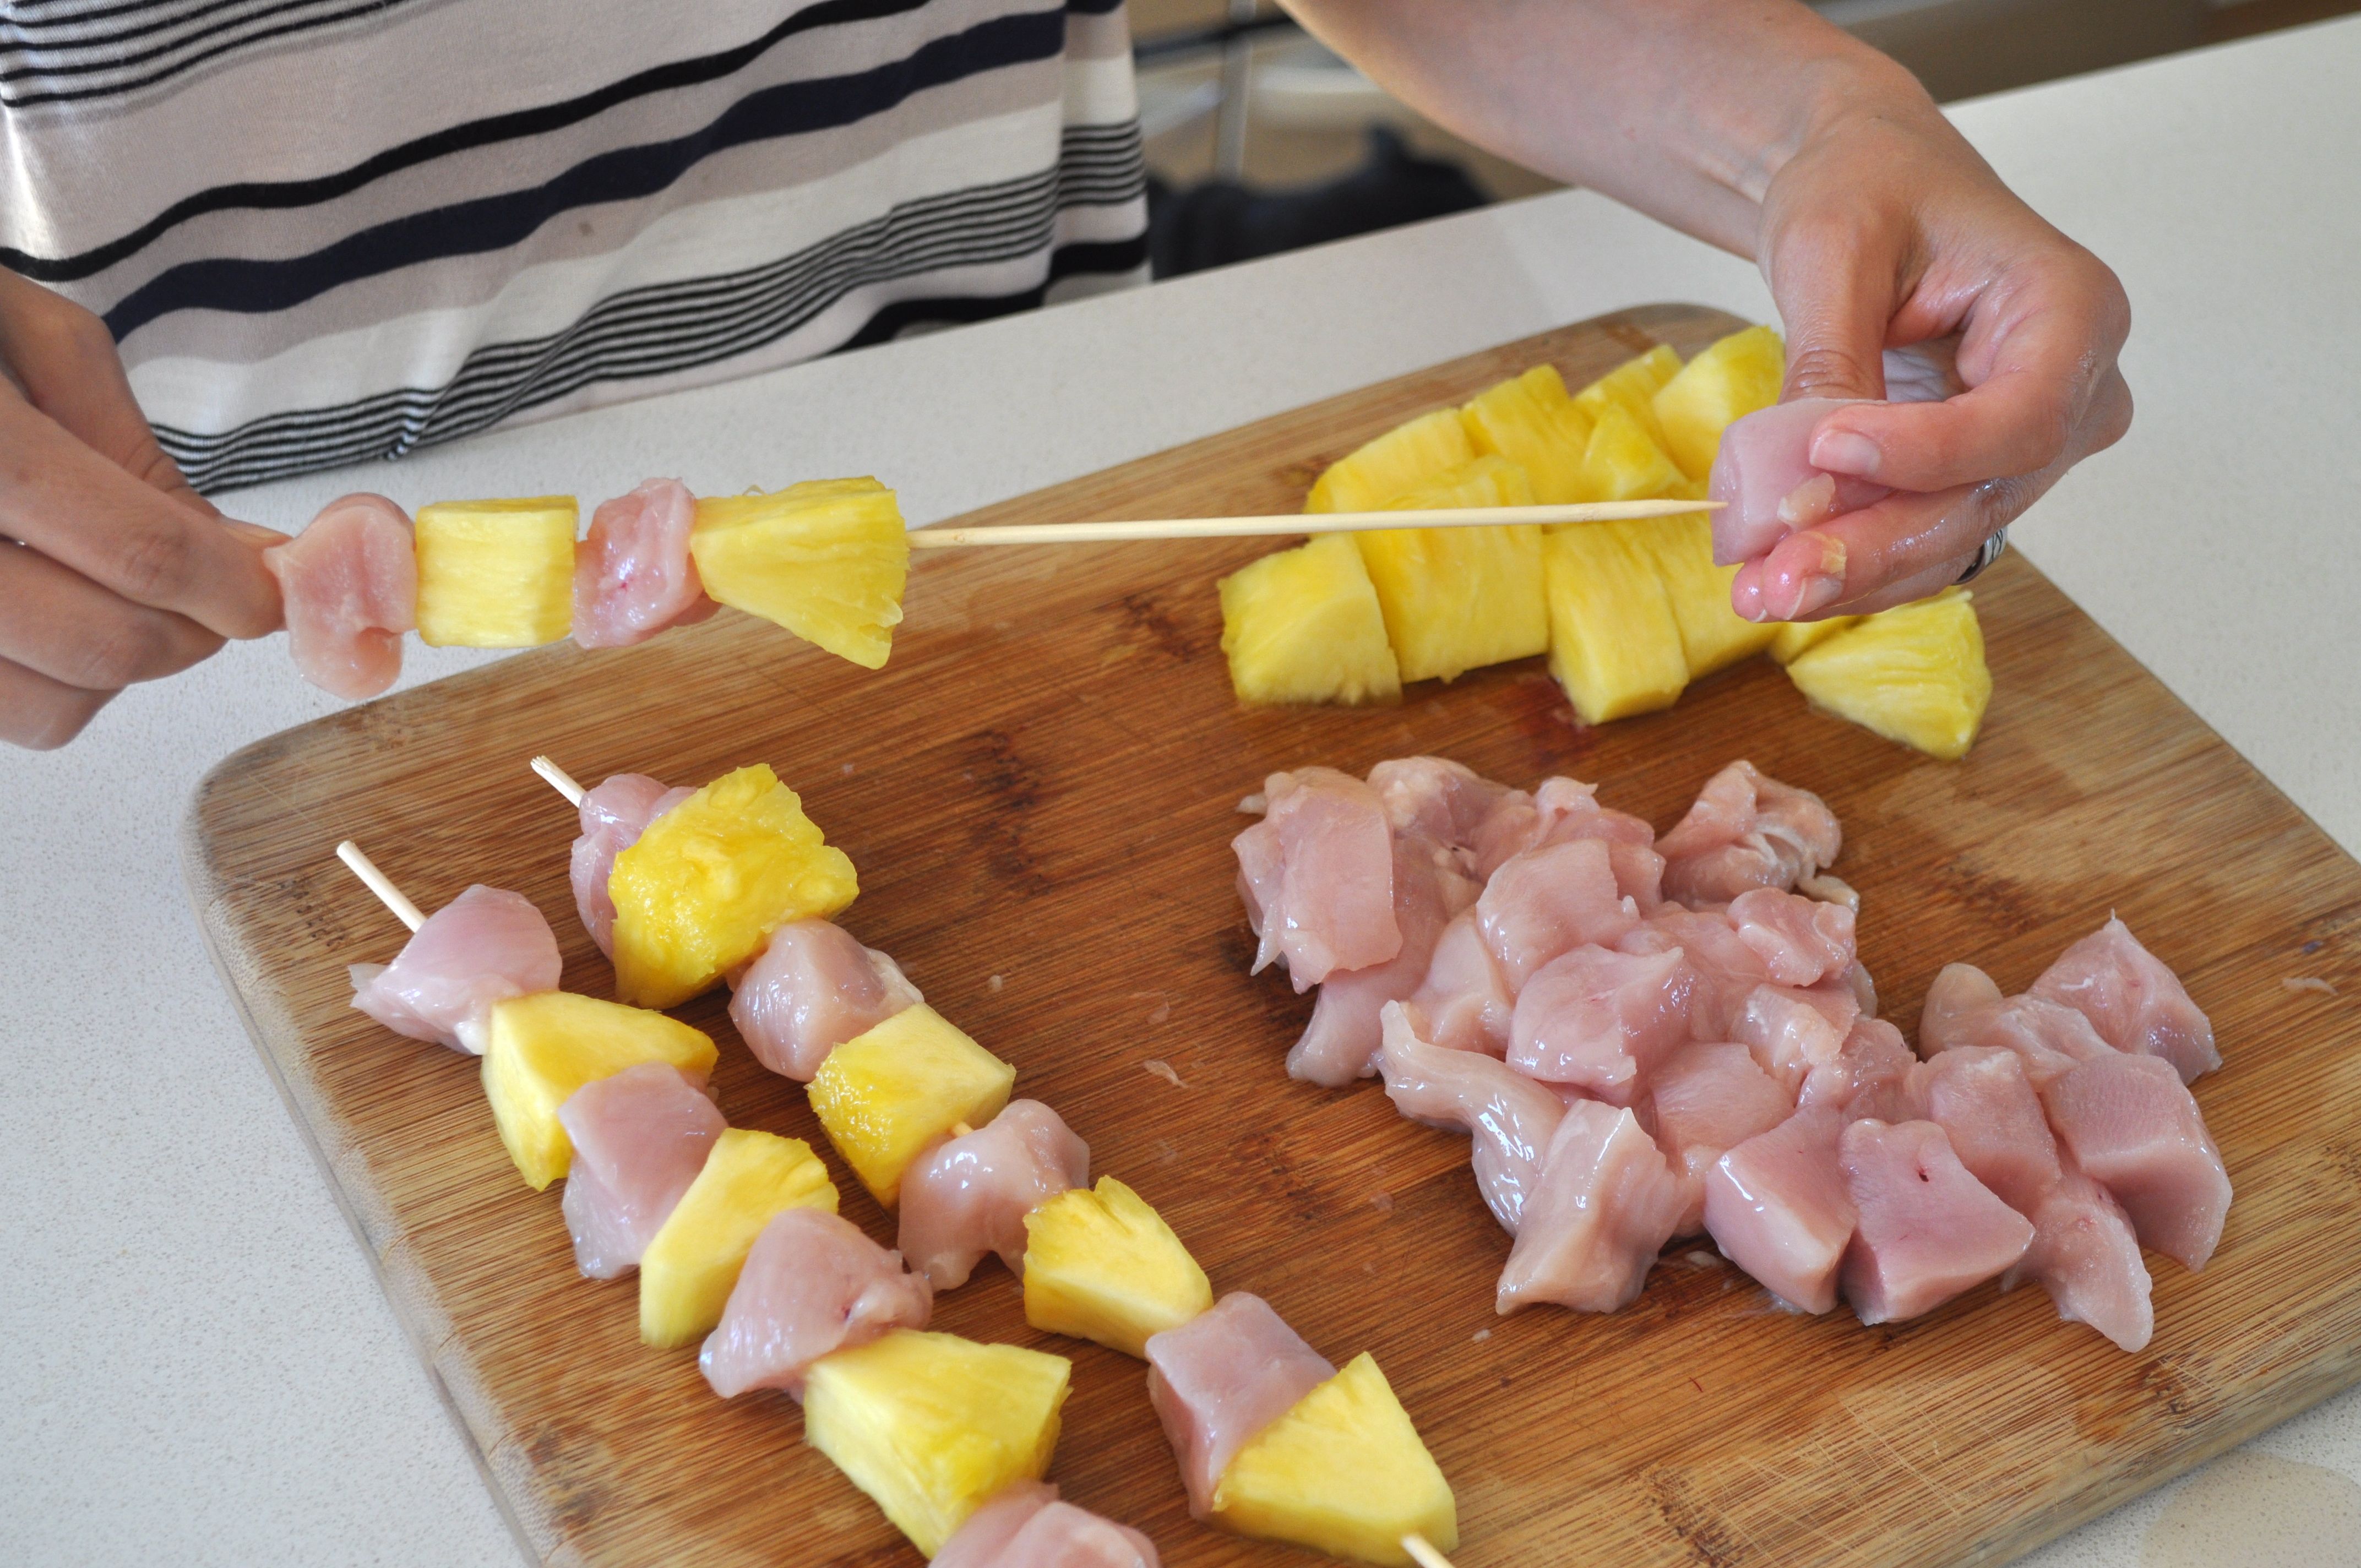
Here are a few chicken recipes I have made over the last few weeks.  When I want to make something fast but still satisfying, I immediately think of Chicken and Pineapple Skewers.  Chicken, pineapple, on a skewer – sprinkle with salt (or soy sauce) and some toasted sesame oil.  Grill until chicken is cooked through.  The sesame oil adds a terrific flavor, and you only need a little bit.  (Trader Joes carries it for a good price)  These skewers disappear in my house.

garlic

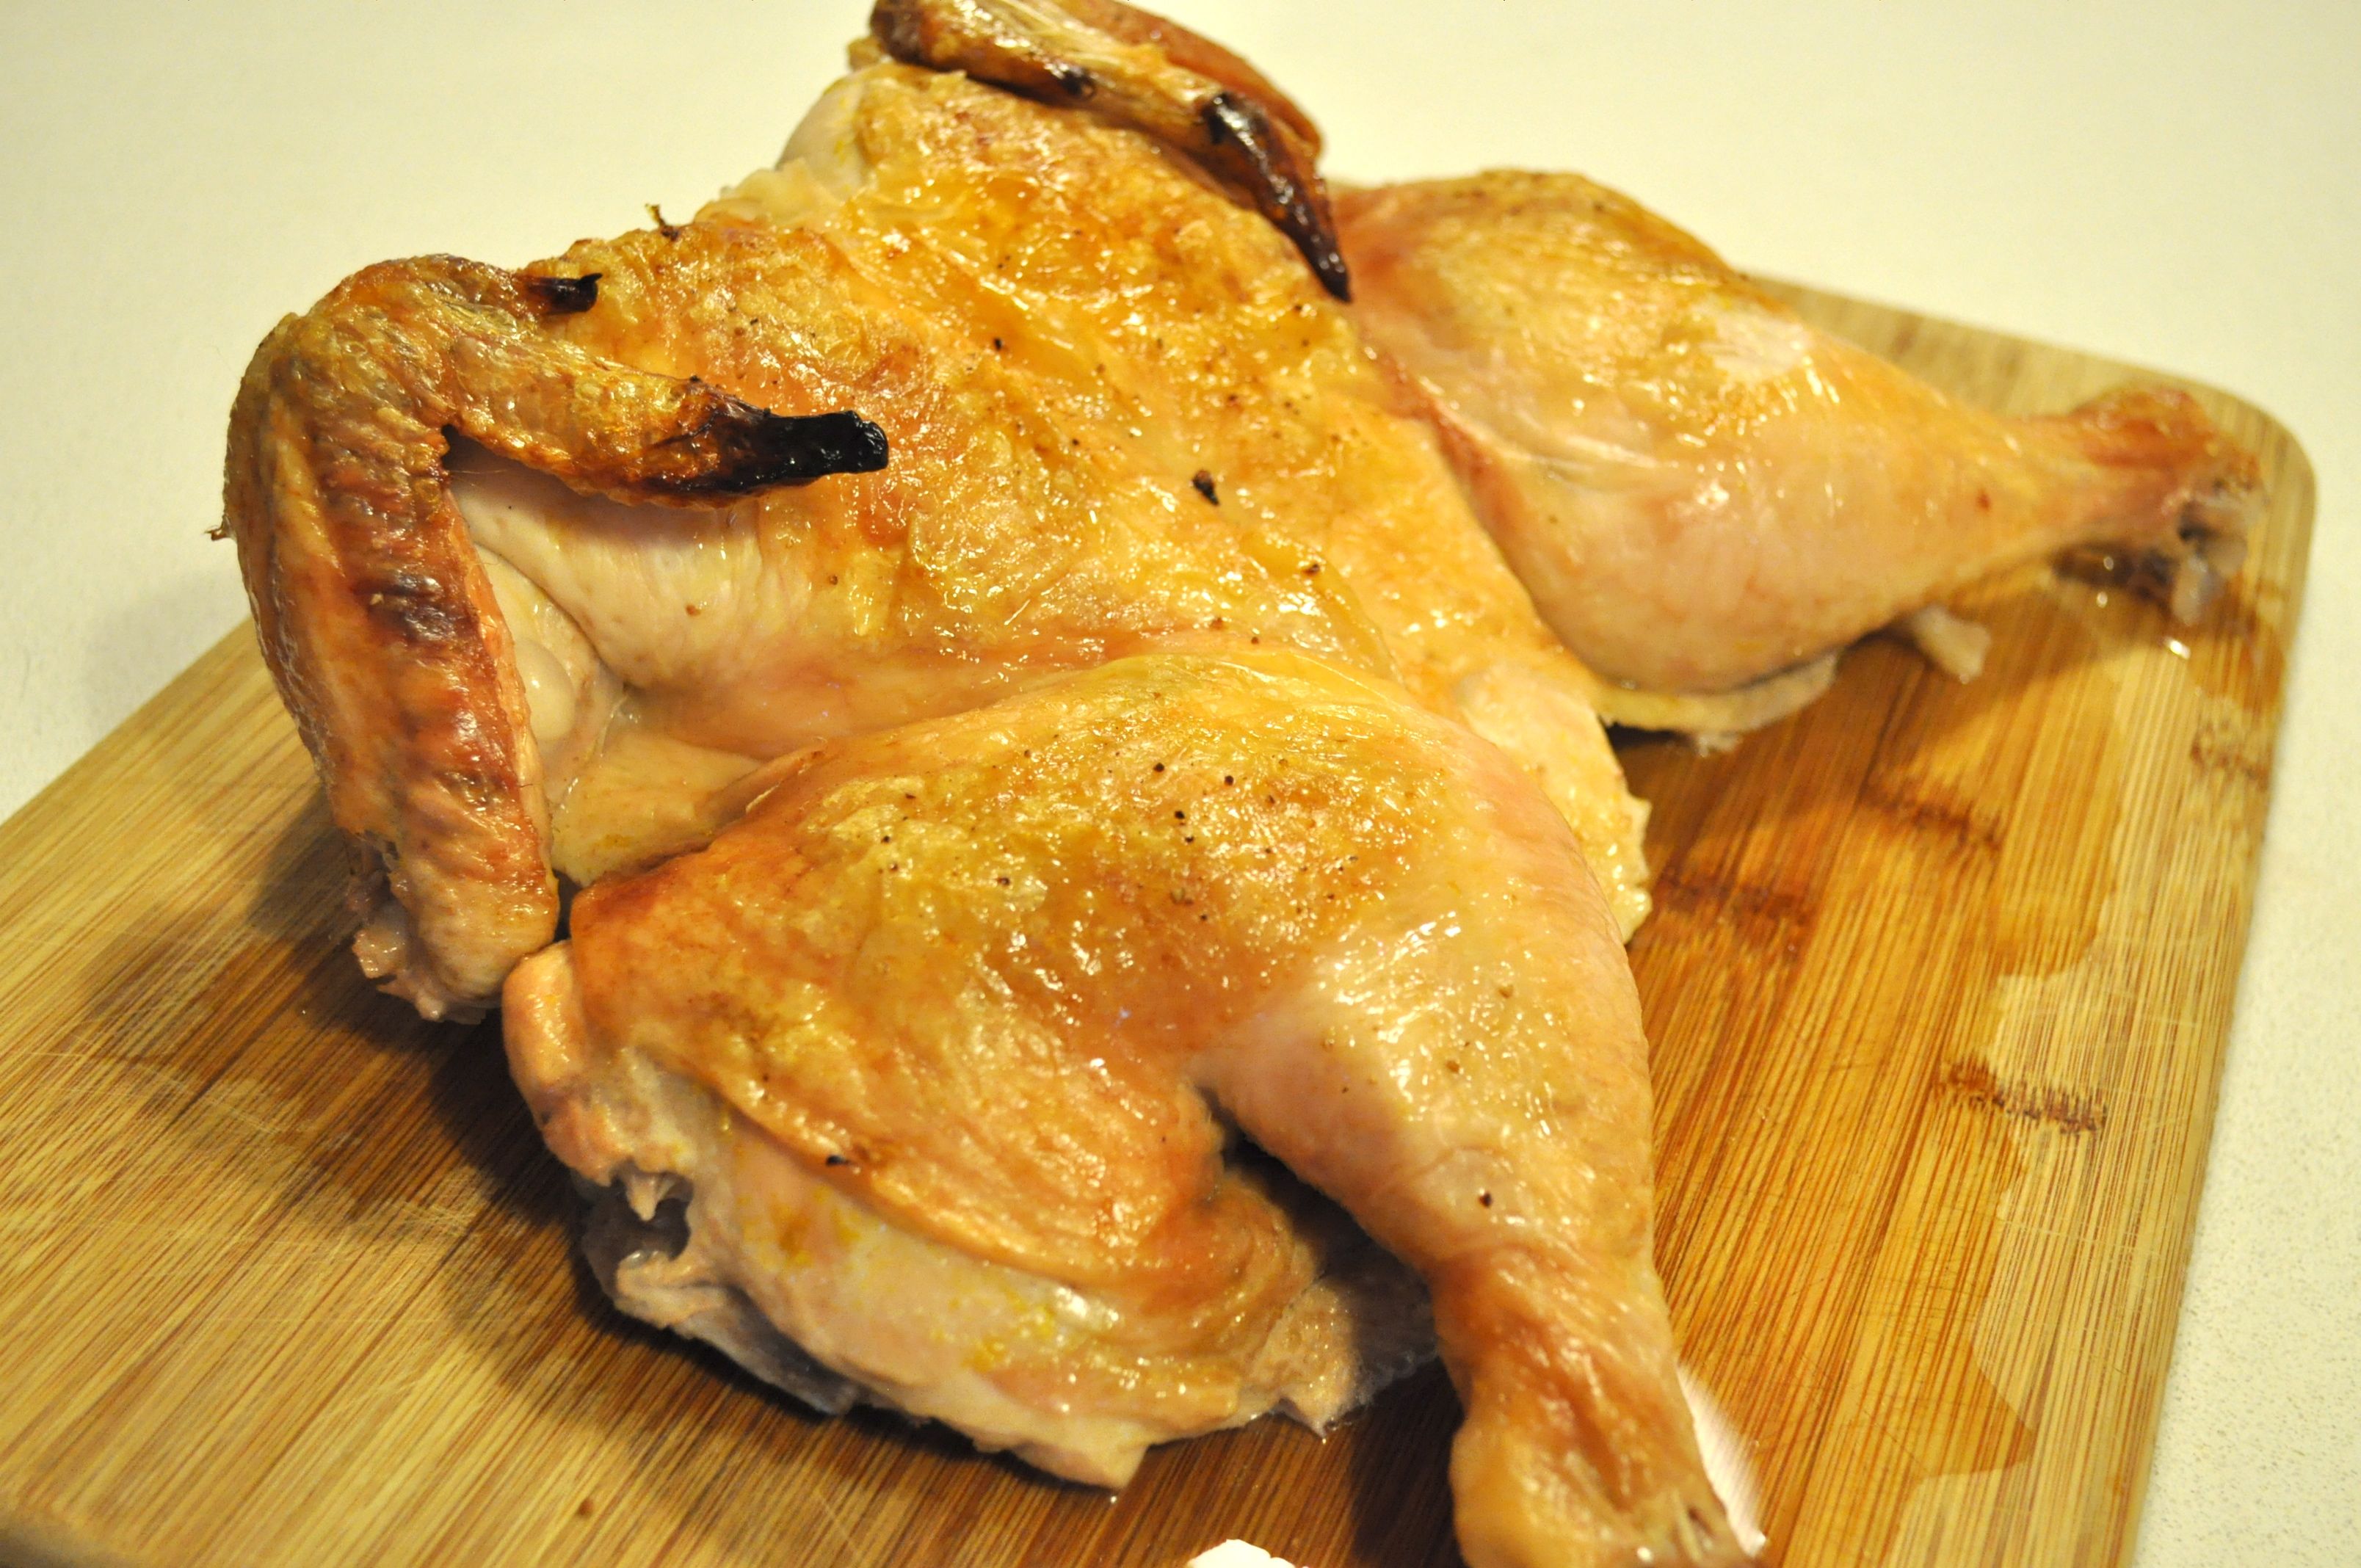
This picture does not do the chicken or the gravy justice.

Ina Garten has a recipe for Chicken with 40 cloves of garlic in her book, Barefoot in Paris, and I’ve always wanted to make it.  In order to make it Paleo compliant, I left out the Cognac, white wine, flour, and heavy cream.  I was worried that it wouldn’t be as good, but then I had an idea to puree the garlic with the chicken stock, and it turned out incredible.   The gravy had such amazing flavor and my husband didn’t believe that it didn’t have cream in it.  I’m calling it magic gravy.  I will be adding this into my regular rotation of meals.

Chicken with 30 cloves of Garlic with Magic Garlic Gravy

Adapted from Ina Garten

30 peeled cloves of garlic (Trader Joes and Costco sell peeled cloves)

1 4 ½-5 pound chicken, cut into eighths (or whatever combination of chicken pieces you want)

1 T butter (or ghee)

1 T olive oil

1 ½ cups of chicken stock

Season chicken liberally with kosher salt and pepper on both sides.  Heat the butter and oil in a Dutch oven over medium-high heat.  In batches, sauté the chicken in the fat, skin side down first, until nicely browned, about 3-5 minutes on each side.  Turn with tongs or a spatula; you don’t want to pierce the skin with a fork.  If the fat is burning, turn the heat down to medium.  Put the chicken pieces on a plate.  Add all of the garlic cloves to the pot.  Lower the heat and sauté for 5-10 minutes turning often, until evenly browned.  Add the chicken stock and return to a boil and scrape the brown bits from the bottom of the pan.  Return the chicken to the pot with the juices.  Cover and summer over low heat for about 30 minutes, until all the chicken is done.

Remove the chicken and half the garlic cloves to a platter and cover with foil to keep warm.  Raise the heat and cook down the broth just a bit.  Pour broth and garlic from pot either into a blender or use a hand blender to blend together.  Taste to see if it needs more salt or if you want to throw in a few more of those garlic cloves.  You can either pour the sauce over the chicken or you can pass the gravy separately, which is what I did.

*Next time I will double the garlic and chicken stock, just so I can have more gravy.

*You can make this ahead, just refrigerate the chicken with the sauce an reheat over low heat before serving.

Chickens

Chicken Francese

We ate a lot of Italian food growing up and one of my favorite things was Chicken Francese: thin chicken breast filets dredged in flour and then dipped in egg and cooked in olive oil – add in some wine and lemon and you’re good to go.  Fast enough for a weeknight meal, but impressive enough for company.

Chicken Francese

2 skinless, boneless, chicken breasts (about a pound or so)

Flour for dredging (if Paleo, use almond meal)

Salt and Pepper

2 eggs, beaten

olive oil

½ small lemon, with rind, cut into thin rounds

1 cup chicken broth

½ cup dry white wine (skip if Paleo)

½ small lemon, juiced

1 T butter or ghee

chopped parsley

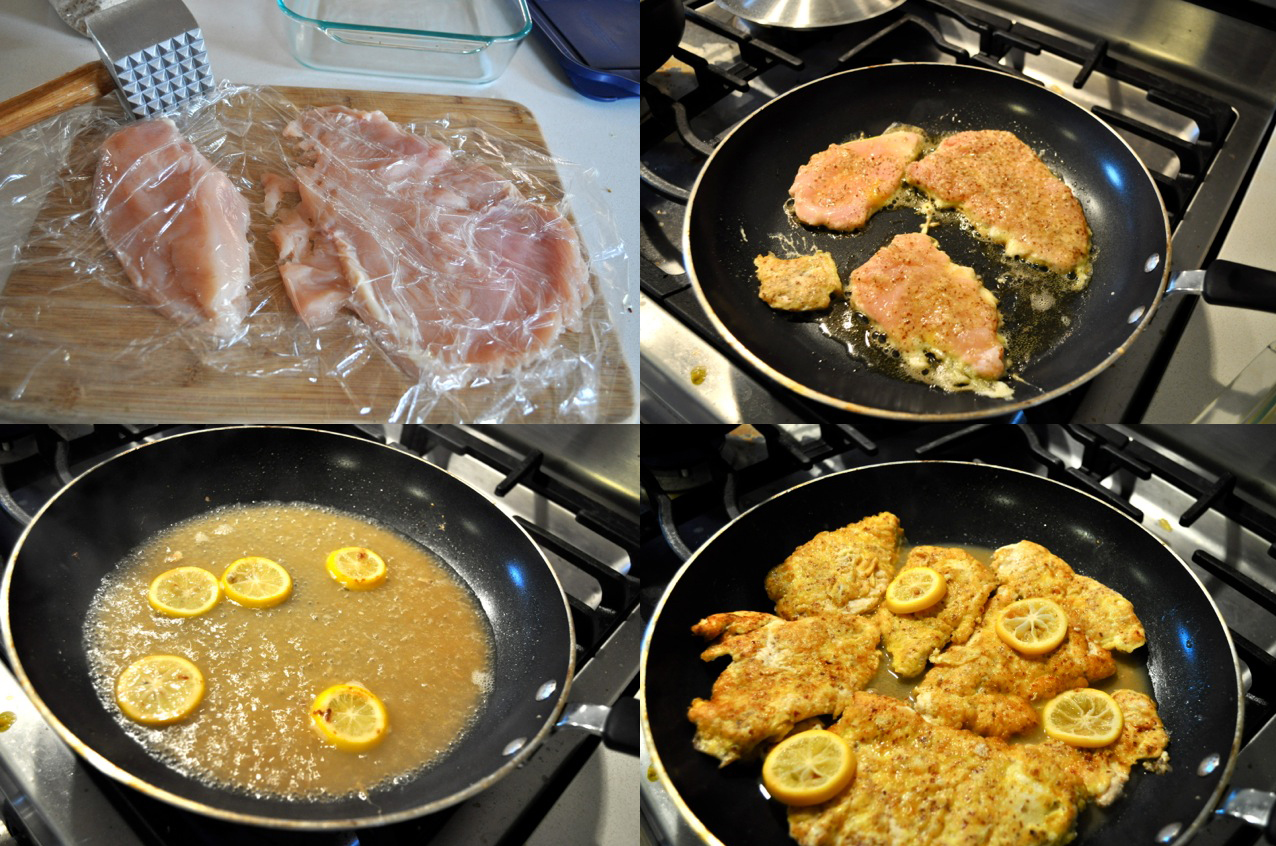
Put chicken breasts between 2 pieces of plastic wrap on a cutting board.  Pound until they are about ¼ inch thick (to me, pounding away at a chicken breast is very cathartic).  Cut the chicken into more manageable sized pieces.  Season chicken with salt and pepper.

Heat some olive oil over medium-high heat in a large skillet.  Dredge the chicken in the flour or almond meal, dip them into the beaten egg, and add the chicken to the skillet and fry until golden, about 2 minutes on each side.  You will probably need to do this in 2 batches.  Remove the chicken to a platter.

Toss the lemon slices into the pan and cook for a minute or two.  Add the chicken broth (wine if you’re using it) and lemon juice, and simmer for a few minutes to reduce a bit.  Add the butter to the skillet (add a bit of flour to the butter if you want a thicker sauce) and swirl it around.  Reduce the heat and return the chicken to the pan to get warmed through.  Sprinkle parsley on top.  Enjoy.

Over the next couple of weeks I will be making Tandoori chicken (using coconut milk instead of yogurt for marinating), almond crusted chicken tenders, and Buffalo chicken wings.  All Paleo and all delicious.  Although it would be nice to dunk the chicken wings into a rich, thick, blue cheese sauce……mmmmmm……..only a couple more weeks until the return of my beloved cheese.

“A dessert without cheese is like a beautiful woman with only one eye.” – Jean Anthelme Brillat-Savarin

Advertisement

New Kitchen, the Paleo Experiment, & the Best Roast Chicken


New

The tiny cook is back and I have a lot to talk about.  First, drum roll please…I have a fabulous new kitchen!  I’d like to thank Ikea for making affordable cabinetry and Home Depot for dealing with my price haggling on my 2 ranges (with 2 warming drawers).  I am so grateful for the new hub of our house.

Old

Old kitchen

What have I been cooking in my new kitchen?  Well, I’m glad you asked because I have been cooking up a storm over the holidays and now I’m ready for a healthy start to the New Year (aren’t we all?)  After hearing so many wonderful things about the Paleo diet, I decided to give it a try for 30 days to cleanse my body of all the wine and cheese I ate over the holidays.  Let me first say that as someone with a foodie heart, I do not plan on sticking with this way of eating for the rest of my life.  For me, this is a way for me to create some new, healthy eating habits and it’s a fun food challenge.  What is Paleo?  To sum it up, eat like the cavemen used to eat: each meal should include a palm size piece of organic protein (pastured and/or grass fed is best), 2 thumb sized knobs of fat (ghee, olive oil, & coconut oil are good), and the rest of your plate should be filled with veggies.  No dairy, no grains of any kind, no legumes.  You can read more details about it here.

I have just finished the first week and so far I feel pretty good.  No withdrawal headaches or crazy cravings.  I haven’t felt that bloated feeling you feel after eating a giant bowl of pasta, but besides that, nothing earth shattering.  The 3rd and 4th weeks I’m supposed to feel “Tiger Blood” – a huge energy boost that is supposed to come along with clear skin.  I’ll keep you posted on that.  For now, here is a list of things I ate for the first week:

Week 1

The first recipe I’d like to highlight is Lemon Roast Chicken, which is incredibly satisfying and cooks fast enough to make it weeknight material.  This recipe is a must-try.

ChickenBefore

Lemon Roast Chicken

This recipe is adapted from Cook’s Country

1 (4-5 pound) whole chicken, backbone removed (save this in your freezer to make stock later), and butterflied (*this can be done the night before)

3 Tablespoons grated zest, plus 1/3 cup juice from 2-3 lemons

(*Note – I used Meyer lemons because that’s what’s growing in my yard, but you can use regular lemons, you just might want to add 1 tsp of sugar to the zest)

Salt and Pepper

2 cups chicken broth

1 cup water

1 – Adjust oven rack to middle position and heat oven to 475 degrees.  Pat chicken dry with paper towels.  Combine lemon zest and 1 tsp salt.  Rub 2 Tablespoons zest mixture under skin of chicken (breasts and legs).  Season chicken with plenty of kosher salt and some pepper and transfer to a small roasting pan or a 9x 13 cake pan.  (If the pan is too big, the liquid will evaporate and burn your pan – trust me, it happened to me).

2 – Whisk broth, water, lemon juice, and remaining zest mixture together and add it to the roasted pan.  (The liquid should just reach skin of thighs.  If it doesn’t, add enough water to reach the skin.)  Roast until skin is golden brown and thigh meat registers 170 to 175 degrees, about 40 minutes.  Transfer to cutting board and let rest for 20 minutes.

3 – Eat the delicious, crispy skin and then carve and enjoy!  A 5 pound chicken feeds my family of 4 for dinner, plus I have plenty of leftovers for sandwiches and chicken salad all week long.

*You can make a light gravy with the juices and some cornstarch, but I find the jus in the pan so flavorful by itself.

Roast

*Another goal for the New Year is to learn to take better pictures for the blog.  Be patient with me.  They are coming.

*Also, I have a Facebook page now, so “Like” me on Facebook if you want to be notified in your news feed anytime I have a new post.  Or you can sign up for e-mail subscription on the right hand side of my homepage.  Thanks for your support and happy cooking and eating!

L’appetito e la salsa piu buona che ci sia. 

“Appetite is the best condiment there is.”

-Italian Proverb

The Revelation of Roasted Broccoli!

Looking for a meal to please both the kids and you – and is healthy?  Look no further than chicken tacos with roasted broccoli (this ain’t your boring steamed broccoli)!  I had some organic chicken thighs (better than breasts for tacos because they stay so moist) and corn tortillas in the freezer and immediately thought of tacos.

There is a chicken recipe I’ve wanted to try from Fine Cooking August/Sept 2011 (my favorite magazine), where you marinate the chicken (you could also use fish) in Tamarind soda(Jarritos brand) and soy sauce – check it out here.

I’m not sure the Tamarind soda really came through, all I was tasting was soy sauce, but I still loved it because it tasted like one of those Asian fusion tacos.  I toasted the corn tortillas over a gas flame on my stovetop, which makes them taste so amazing!  Then I let the kids fill their own tacos, which they loved.  Fillings: chopped tamarind soy chicken, shredded sharp cheddar, diced avocado, and homemade salsa.  For the salsa: I grilled some tomatoes just enough to get some charred marks allover them, then threw them into the blender with some white onion, cilantro, jalapeno, and salt.

As for the Roasted Broccoli, heat your oven to 425 degrees and cut florets from either 1 large head of broccoli, or 2 smaller heads.  Put the florets on the sheet pan and drizzle with olive oil and some kosher salt.  Toss everything really well with your hands and spread out.  Roast for about 20 minutes then toss around with a spatula and roast for another 10 minutes or so, or until the stalks are tender.  The broccoli develops little toasty bits all over them, transforming the broccoli to something so tasty that it doesn’t even taste like broccoli.  My kids scarfed them down and then asked for seconds and thirds!